
How Long Does Tile Bond in Take to Dry. Tile Bond in is an important part of tile installation because it helps tiles stick firmly to floors and walls. Whether you are installing ceramic tiles in your home, porcelain tiles in a modern apartment, bathroom tiles, or flooring in a commercial building, understanding the correct tile bond drying time helps prevent loose tiles, weak bonding, and expensive repairs.
In Pakistan, tile adhesive is commonly used in new construction, home renovations, kitchens, bathrooms, and commercial projects. However, one common question homeowners and contractors ask is: how long does tile bond take to dry?
In most standard cement-based tile adhesive applications, you should allow approximately 24 hours before grouting or walking on newly installed floor tiles. Some products and installation conditions require longer. Full curing also takes more time than initial setting, so tiles should not be exposed to heavy loads or demanding conditions simply because the surface feels dry.
This guide explains tile bond drying time, the factors that affect curing, when you can walk on tiles, and how to achieve a durable finish.
How Long Does Tile Bond Take to Dry?
Tile bond generally requires around 24 hours before light foot traffic or grouting in standard installations. However, the exact time depends on the adhesive formulation, tile type, installation surface, temperature, humidity, and application thickness.
For example, Stonebird Chemicals lists a 24-hour waiting period before grouting and light foot traffic for its Stone Bond Tile Bond Adhesive, with full curing described as occurring within seven days under standard conditions. Other products may have different instructions, so always check the specific product’s technical data sheet. Stonebird’s product information.
The following timeframes are general planning estimates, not universal guarantees.
Typical Tile Bond Drying Time
Before walking on floor tiles: Allow approximately 24 hours for light foot traffic when the product instructions permit it.
Before grouting floor tiles: Many cement-based tile adhesives require around 24 hours, although some products require longer.
Before grouting wall tiles: Certain adhesives allow grouting earlier on walls, depending on the product and conditions. Follow the manufacturer’s instructions rather than assuming the floor and wall drying times are identical.
Before heavy furniture or equipment: Wait longer than the initial setting period. Depending on the adhesive and installation, several days or the manufacturer’s specified full-cure period may be necessary.
Before using a tiled shower or wet area: Follow the specified curing and waterproofing-system requirements. Some adhesive systems require several days before wet-area service.
It is important to understand that drying, setting, and curing are different stages. An adhesive can hold a tile in place before it reaches its intended final performance.
What Is Tile Bond and How Does It Work?
Tile bond is a tile adhesive designed to attach tiles to a suitable surface, such as a cement-based floor, plastered wall, or another approved substrate. Many products contain cement, graded fillers, and additives that improve workability and bonding.
When water is mixed with a cement-based tile adhesive, a chemical hydration process begins. As the adhesive hardens, it develops the bond needed to hold the tiles in place.
Unlike ordinary cement and sand mixtures, manufactured tile adhesives are formulated for specific installation requirements. Depending on the product grade, they may support ceramic tiles, porcelain tiles, natural stone, and other approved materials.
However, not every tile bond is suitable for every application. A standard adhesive may work for certain ceramic tiles but may not be appropriate for large-format porcelain, exterior flooring, or demanding wet areas.
Choosing the right adhesive and allowing it to cure properly are both essential for a successful installation.
Factors That Affect Tile Bond Drying Time
Several factors determine how quickly tile bond sets and develops strength. Understanding these factors helps you plan your construction work and avoid disturbing freshly installed tiles.
1. Temperature and Weather Conditions
Temperature can significantly affect tile adhesive performance. Warm conditions may accelerate moisture loss and shorten the working time of an adhesive, while cooler conditions can slow the setting process.
In Pakistan, high temperatures during summer can create challenging installation conditions, especially on exposed rooftops, balconies, and exterior walls. Direct sunlight can heat the surface and cause the adhesive to lose moisture too quickly.
Avoid installing tiles on excessively hot surfaces. Work within the temperature range specified by the manufacturer and protect fresh installations from harsh sun, strong wind, and other unsuitable conditions.
Do not assume that a tile bond will cure faster simply because the weather is hot. Rapid surface drying does not necessarily mean the adhesive has developed sufficient bonding strength.
2. Humidity and Ventilation
Humidity affects how moisture moves through and away from the tile installation. Cement-based adhesives need water for hydration, while some ready-mixed adhesives depend more heavily on moisture evaporation to develop their bond.
Poor ventilation, high humidity, and limited moisture escape can extend the setting time of certain products. This is especially important when installing large, low-absorption tiles.
For example, a large porcelain tile may restrict moisture movement through its surface. As a result, the adhesive underneath can take longer to dry than an installation involving smaller, more absorbent ceramic tiles.
Follow the product instructions and allow additional time when site conditions are less favourable than the conditions used for the manufacturer’s published drying estimates.
3. Type and Size of Tiles
The type of tile plays an important role in determining drying time.
Ceramic tiles may absorb more moisture than porcelain tiles, depending on their properties. Porcelain tiles typically have very low water absorption, which can slow the drying of some adhesive formulations.
Large-format tiles can also restrict moisture movement because they cover a greater surface area. If the adhesive bed is thick or moisture cannot escape easily, the installation may require additional time.
Before installing porcelain, marble, granite, or large-format tiles, confirm that the adhesive is specifically approved for that material and tile size.
4. Thickness of the Adhesive Layer
The thickness of the adhesive layer affects both setting and curing. A thicker layer may take longer to develop the required strength, particularly when moisture movement is restricted.
Applying too much tile bond to compensate for an uneven surface is not a reliable solution. Excessive thickness can cause uneven setting, shrinkage-related problems, or poor tile support if the product is not designed for that application.
Prepare the substrate properly and use the recommended notched trowel to achieve the correct adhesive bed.
5. Surface Preparation
A clean, stable surface helps the adhesive bond properly. Dust, grease, loose plaster, weak cement, and other contaminants can interfere with adhesion.
The substrate must also meet the product’s moisture and preparation requirements. Some surfaces need priming, while others require specific preparation before tile installation.
Poor surface preparation may cause tiles to become loose even if the adhesive has been left undisturbed for the recommended period.
Before applying tile bond, remove loose material, check the surface condition, and follow the manufacturer’s preparation instructions.
6. Type of Tile Adhesive
Different tile adhesives have different setting and curing characteristics.
Standard cement-based adhesives commonly require around 24 hours before light foot traffic or grouting under suitable conditions. Rapid-setting adhesives may permit earlier use, while certain ready-mixed adhesives can take longer to dry beneath non-porous tiles.
For example, Aquafin Pakistan’s UNIFIX technical information lists approximately 24 hours before grouting and foot traffic, while Sika’s rapid-setting tile adhesive specifies a much shorter grouting interval for that particular formulation.
These differences demonstrate why the product label and current technical data sheet should always guide your installation schedule.
When Can You Walk on Newly Installed Tiles?
In many standard floor installations, light foot traffic is permitted after approximately 24 hours. However, this depends on the adhesive, tile size, substrate, temperature, and manufacturer’s instructions.
Walking on tiles too early can move them out of alignment, disturb the adhesive bed, or weaken the bond before it has developed sufficient strength.
For the best results, follow these precautions:
- Keep people away from the tiled floor during the initial setting period.
- Avoid dragging tools, ladders, or construction materials across freshly installed tiles.
- Do not place heavy furniture or equipment on the floor before the specified waiting period.
- Protect fresh tiles from vibration and impact.
- Check the adhesive instructions before allowing any foot traffic.
If you are installing tiles in a busy home, shop, office, or commercial building, plan the work so that the area can remain undisturbed for the required period.
Remember that being able to walk on a floor does not mean the adhesive has reached its full cured strength.
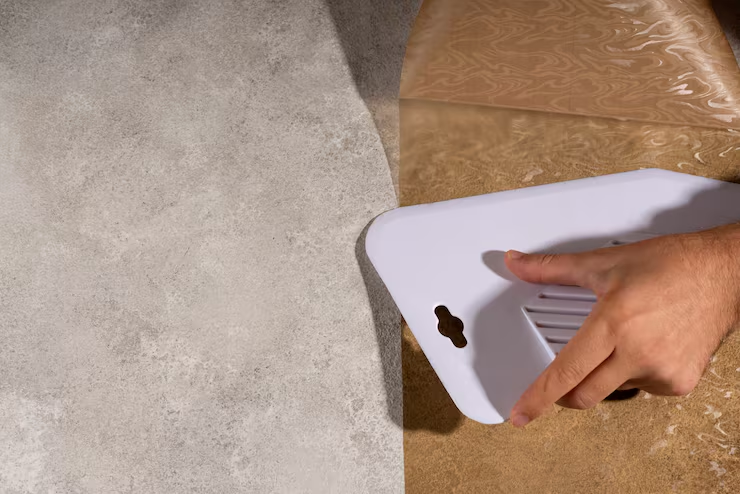
Wall tile adhesive may have a different grouting schedule from floor adhesive because wall tiles are not subjected to the same direct foot traffic. Some products allow wall grouting after several hours, while others require longer.
For example, Mapei lists a waiting time of four to eight hours before grouting walls and approximately 24 hours for floors for its Kerabond T product. These times apply to that specific adhesive under the relevant conditions, not to every tile bond product.
Wall installations also require attention to tile weight, tile size, adhesive slip resistance, and substrate stability.
For bathroom walls, kitchen backsplashes, and decorative feature walls, choose an adhesive approved for the tile material and the installation surface. Avoid applying excessive adhesive or disturbing tiles while the bond is developing.
Always check the product instructions before beginning grouting or applying additional finishing materials.
How Long Does Tile Bond Take to Dry for Bathrooms?
Bathrooms require extra care because tiles are exposed to moisture and, in showers, repeated water contact.
A standard cement-based tile adhesive may permit grouting after approximately 24 hours, but this does not automatically mean the tiled area is ready for regular water exposure.
The correct waiting period depends on the adhesive, grout, waterproofing system, and installation conditions. Some products and systems require several days before wet-area service.
When installing bathroom tiles, consider the following points:
Use a suitable adhesive: Select a product approved for bathroom walls or floors and the tile material.
Install waterproofing where required: Tile adhesive and grout alone do not create a complete waterproofing system. Showers and other moisture-sensitive areas may need a compatible waterproofing membrane.
Allow adequate curing time: Do not use the shower or wash the tiled surface until the adhesive, grout, and waterproofing-system instructions permit it.
Pay attention to joints: Movement joints and changes of plane should be treated according to the specified installation system.
Taking these precautions helps reduce the risk of water damage, loose tiles, and premature failure.
How to Make Tile Bond Dry Properly
You cannot safely force every tile adhesive to dry faster, but you can help it develop its intended performance by following the correct installation method.
Prepare the Surface Properly
Start with a stable, clean substrate. Remove dust, grease, loose material, and other contaminants. Check whether the surface requires priming or any special preparation.
Mix Tile Bond According to Instructions
Use the manufacturer’s recommended water ratio. Adding too much water can affect consistency and performance, while adding too little may make the adhesive difficult to spread and apply correctly.
Mix thoroughly and allow the adhesive to stand before remixing if the product instructions specify a resting period.
Apply the Correct Amount
Use an appropriately sized notched trowel. Spread only as much adhesive as you can cover within the product’s open time.
Do not apply adhesive over a large area and leave it exposed for too long. If a surface film develops, the adhesive may no longer provide the required bond.
Press Tiles Firmly into Place
Position each tile within the adhesive’s open time and press it firmly to achieve the required contact. For large-format tiles, back-buttering may be necessary when recommended by the manufacturer.
Adequate adhesive coverage is important because empty spaces beneath tiles can contribute to cracking, water accumulation, or bond failure.
Protect the Installation
Keep the newly tiled area free from unnecessary movement, heavy loads, direct water exposure, and unsuitable environmental conditions during the initial curing period.
Avoid using heaters or other artificial drying methods unless the manufacturer specifically permits them.
Wait Before Grouting
Grouting too early can disturb the installation or interfere with moisture release in certain adhesive systems.
Follow the specified waiting period for the exact product and installation. If the tiles are large, the adhesive bed is thick, or the conditions are unfavourable, seek guidance before proceeding.
Common Mistakes That Slow Drying or Cause Tile Bond Failure
Even a quality adhesive can fail when it is applied incorrectly. Avoid these common mistakes during tile installation.
Adding excess water: Incorrect mixing can reduce the adhesive’s intended performance and create application problems.
Using the wrong adhesive: A product intended for standard ceramic tiles may not be suitable for porcelain, large-format tiles, or exterior installations.
Installing tiles on an unsuitable surface: Dusty, weak, contaminated, or improperly prepared substrates can prevent proper bonding.
Walking on tiles too soon: Premature foot traffic can move tiles and disturb the adhesive bed.
Grouting before the recommended time: Early grouting may interfere with the installation, depending on the product and site conditions.
Exposing fresh tiles to water: Moisture exposure before the adhesive and other installation materials are ready can affect the result.
Ignoring the weather: Extreme heat, cold, humidity, or wind can change working and curing conditions.
Assuming the surface is fully cured: An adhesive that feels hard may still need more time to develop its intended performance.
Avoiding these mistakes is often more important than simply choosing the fastest-drying product.
Frequently Asked Questions
How long does Tile Bond in take to dry?
Most standard cement-based tile adhesives require approximately 24 hours before light foot traffic or grouting under suitable conditions. However, the exact time depends on the formulation, tile type, surface, temperature, and humidity. Some products permit earlier grouting, while others require a longer waiting period. Always check the product’s technical data sheet before walking on the tiles or continuing the installation.
Can I walk on tiles after 12 hours?
You should not assume that newly installed tiles are ready for foot traffic after 12 hours. Many standard tile adhesives specify approximately 24 hours before light foot traffic. Rapid-setting products may allow earlier use, but only when their instructions permit it. Walking too early can move tiles, disturb the adhesive bed, and weaken the installation. Follow the manufacturer’s specified waiting time for your particular product.
How long should I wait before grouting tiles?
Many cement-based tile adhesives require around 24 hours before grouting floor tiles. Some products specify a shorter waiting period for wall tiles, and rapid-setting formulations may permit earlier grouting. Large-format tiles, thick adhesive beds, and unfavourable conditions can increase the waiting time. Check the technical data sheet rather than relying on a general rule, and make sure the adhesive has reached the required setting stage before filling the joints.
Does tile bond dry faster in hot weather?
Hot weather can accelerate moisture loss and shorten the adhesive’s working time, but that does not guarantee a stronger or faster-curing installation. Excessive heat and direct sunlight can cause the adhesive to lose moisture too quickly, reducing bonding performance. In Pakistan’s summer conditions, avoid working on excessively hot surfaces and follow the manufacturer’s temperature recommendations. Protect freshly installed tiles from harsh environmental conditions and allow the specified curing time.
How long does tile bond take to dry in a bathroom?
A standard cement-based tile adhesive may require approximately 24 hours before grouting, but a bathroom may need a longer waiting period before exposure to water. The correct time depends on the adhesive, grout, waterproofing membrane, and installation conditions. Shower areas in particular should not be used until the complete installation system is ready for wet service. Follow the instructions for every material used in the installation.
Final Thoughts
Understanding how long Tile Bond in takes to dry is essential for a successful tile installation. In many standard cement-based applications, approximately 24 hours is a useful starting point for planning light foot traffic and grouting. However, this is not a universal rule, and the correct waiting time depends on the adhesive formulation, tile material, substrate, weather, and installation method.
For the best results, choose a tile adhesive that matches your project, prepare the surface carefully, follow the recommended mixing and application instructions, and protect the tiles while the adhesive cures.
If you are comparing tile adhesive products in Pakistan, review the manufacturer’s technical documentation before making a decision. You can explore Stonebird Chemicals, including its Stone Bond Tile Bond Adhesive, for product-specific installation guidance.
A suitable adhesive and the correct curing time help create a stronger, more durable tiled surface and reduce the risk of avoidable repairs.